Appearance
Campaign
Campaign is available after buying a subscription in billing. If you have an active subscription you can create a new campaign and set it up.
Here is an example of homepage for campaign: 
Creating campaign
Press Create button in order to begin the creation of your campaign. Then you will see a menu popup on the right with various fields.
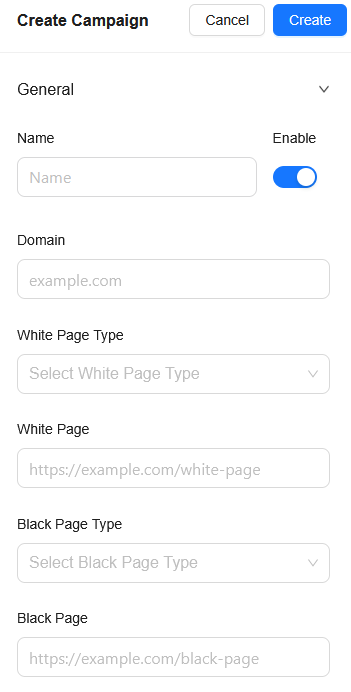
In this image we can see a few things, let's go through each:
- Name - Name of your campaign (must be unique)
- Domain - The domain from which campaign will be launched. Example: you launch GoogleAds on example.com, then in your campaign specify example.com
- White Page Type - Type of your white page, can be: File, Redirect, iFrame
- White Page - This is your white page, specify: File (can be .html or .php) or URL link (Works with: Redirect or iFrame)
- Black Page Type - Type of your black page, can be: File, Redirect, iFrame
- Black Page - This is your black page, specify: File (can be .html or .php) or URL link (Works with: Redirect or iFrame)
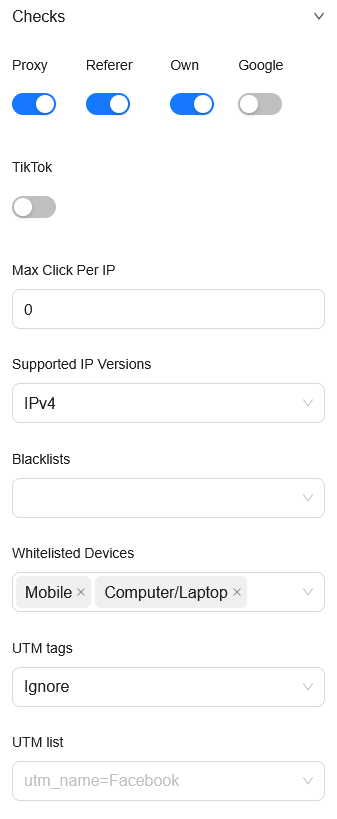
Then there are filters that we provide:
Proxy - Checks if client uses VPN/Proxy, if yes check fails
Referer - Enables check for referer, specify them in
Referer listOwnCheck - Checks made by cloaker.cloud developers, detects bot, scram, bad traffic, uses ML for better filtering
Google - Checks if user went throught Google by looking up Google tag
Tiktok - Checks if user went throught TikTok by looking up TikTok tag
Max Click Per IP - How many times does the same viewer/client may visit black page. (0 = disable)
Supported IP Versions - Filters by IP version (IPV4 or IPV6), if specified IPV6 then client who connects with IPV4 automatically fails this check, allowed input: Ignore, IPV4, IPV6
Blacklists - You can specify your blacklists if you have any
Whitelisted Devices - Specify allowed devices to visit black page, allowed input: Mobile, Tablet, Computer/Laptop
UTM tags - Specify your UTM tags, if you have none then set ignore, if you want to allow only if any utm_tag is present, set
All 'utm_' tags, if you want to filter a SPECIFIC tag then setOnly tags from list belowand specify which UTM tags should be in the link that client will visit.UTM list - List of UTM tags that should be present, by default not checking, but if UTM tags is set to
Only tags from list belowwill check tags from this list.

- Custom Query list - If you are Expert and specify you own tags (Example: https://example.com/my_tag=12) you can specify them here, by default not checking
- Referer list - A list for referer domains. Specify domain with small letters (Example: google.com, googleads.com, facebook.com)
- IP list - Specify Blacklisted IPS or IP section (Example: 192.168.0.1, 192.168.0.1/24)
- Allowed Countries - Specify countries that are allowed to visit your black page
- Allowed Languages - Specify languages that are allowed to visit your black page
Then press Create once again at top right corner and you should see a campaign appear in campaign list.

Download cloak
Once you created campaign, you should see a buttons on the same level as your campaign to the right, press Download icon and new page where you can choose between PHP file or Wordpress addition
For PHP file:
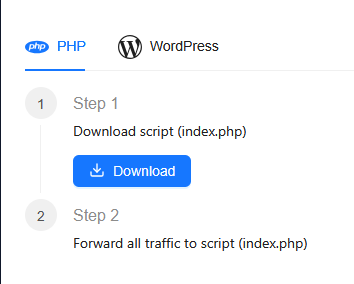
For WordPress (not plugin):
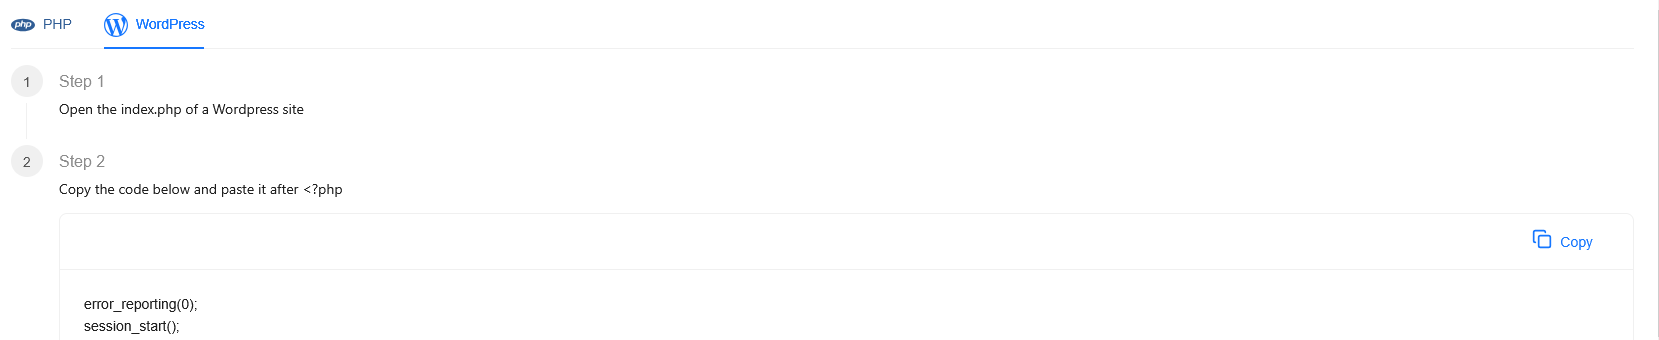
WARNING When using via WordPress. You must specify white page type: file and it White Page: wordpress.php in the campaign settings where you want to use cloak with WordPress. Otherwise White won't work!!!
For WordPress (plugin version):
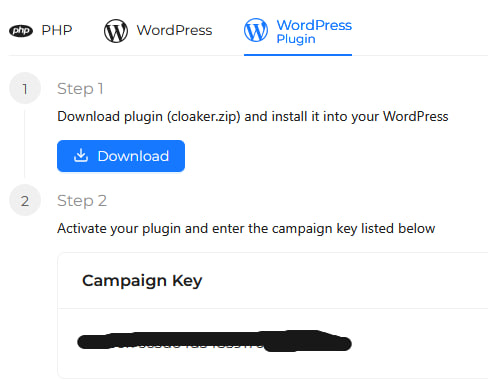
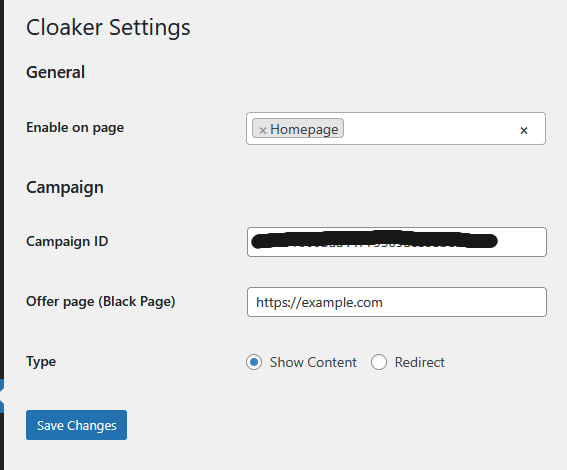
Inside WP change your Black Page and select type (Show Content or Redirect) Also you can select where the cloak will activate itself
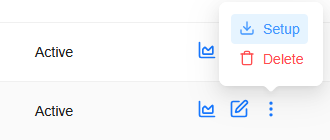
Edit campaign
You can edit campaign by pressing Edit icon on the same level as your campaign and then Save this changes.
Delete campaign
You can delete campaign by pressing Trash icon on the same level as your campaign.
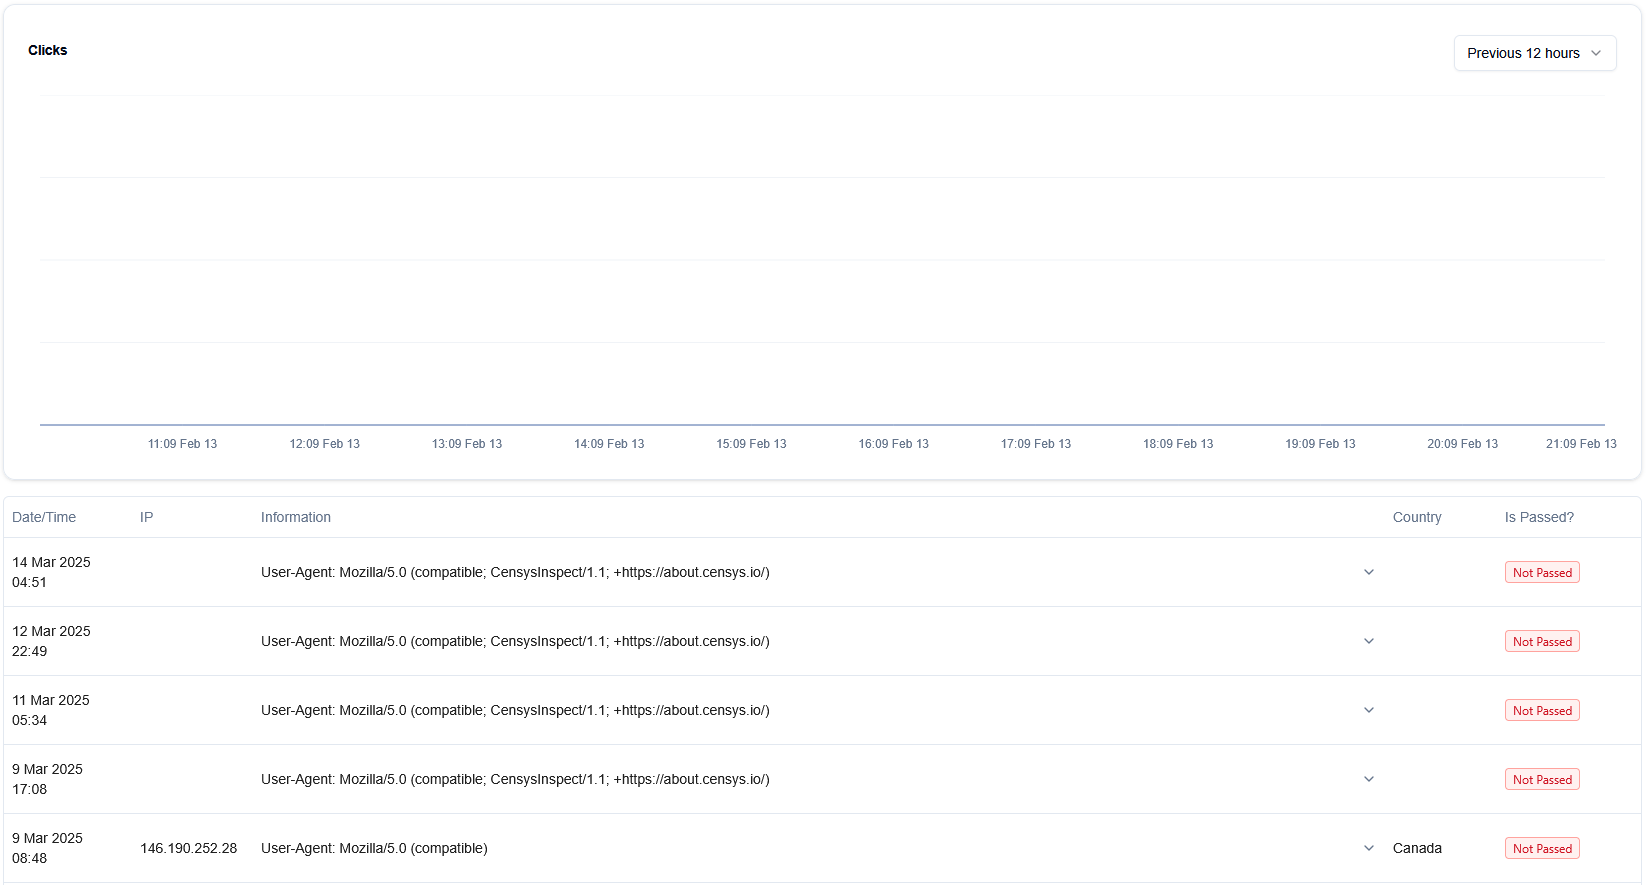
Statistics
You can get statistics for your campaign by pressing Stats icon on the same level as your campaign.
Showcase
Graph stats
For graph view you can specify time range from: 12 hours, 24 hours, 7 days or 30 days.

Detailed statistics
For getting more details on each client request you can simply click on the middle of it


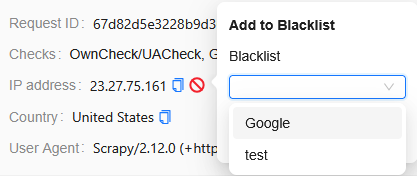
Add to blacklist
You can add to your blacklist: UserAgent or IP or both via button that will appear once you have created a blacklist.
Press a block button to block: User Agent or IP address